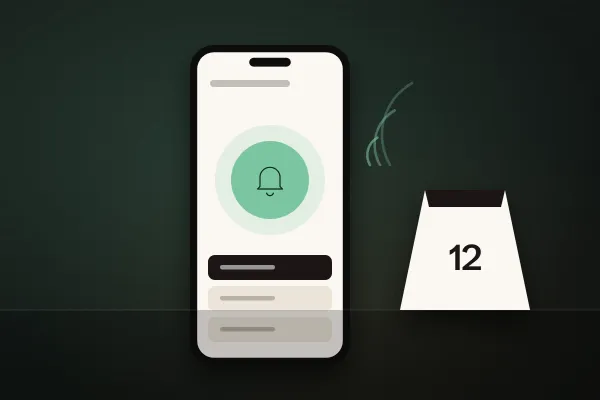
One QR Code for the Menu, Waiter Call, Reviews and the Loyalty Account
The guest scans once and then switches between the menu, staff, the Club and reviews in the bottom navigation.
Each action needs something different: a valid table key, a sign-in or a manager's decision.
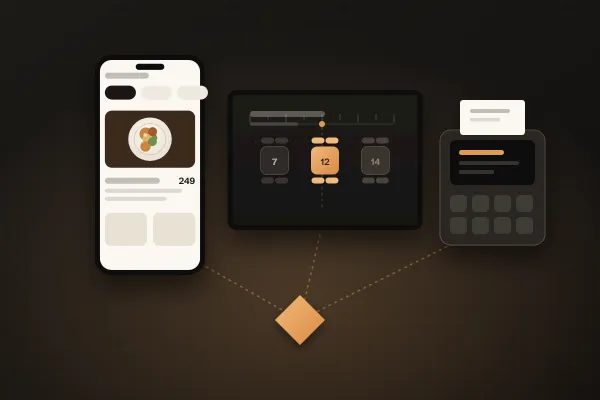
One QR code on the table can open four things: the menu, the waiter call, feedback for the restaurant and the guest's loyalty account. For guests that is easier than three stickers and a hunt for a fourth form. For the restaurant it works only if each action keeps its own rules: the menu needs nothing, the waiter call has to know which table the guest is at, a review goes to the restaurant first, and the loyalty account is the only place where the guest signs in. This guide is for owners and operations managers introducing a QR menu or consolidating the codes already on their tables. It shows what guests see after scanning, what the restaurant has to set up for each action, compares the actions in a table and ends with a rollout plan.
Why one code instead of several
A table where QR codes were added over time may look like this: a code for a PDF menu, a sticker linking to a rating page and a stand inviting guests to a loyalty app. Guests don't know which code is the right one, older stickers lead to dead addresses, and staff can't say which still works. Each code also opens a different environment with its own look and rules.
One code makes this simpler. There is one stand on the table, the guest scans once and finds the other actions in the same place. That doesn't make it one feature, though. Behind the code run four separate processes, each with a different owner on the team: the menu is managed by the operations manager or the kitchen, the waiter call by the shift, feedback is read by a manager and the loyalty programme is applied at the till. Introducing one code is therefore mainly an organisational decision, not a redesign of the table stand.
What guests see after scanning
In RestoCraft that entry point is Premium QR, a web app for guests: the phone camera reads the code and opens the restaurant's website, with nothing to install. At the bottom there is one navigation bar with home, menu, call staff, the Club and reviews („Domů“, „Menu“, „Přivolat obsluhu“, „Klub“ and „Recenze“ in the Czech interface). The home screen shows the introduction, story, gallery, opening hours and contacts from the restaurant's website, so guests can get to know the place they are sitting in first.
The menu, waiter call, reviews and gallery work without an account or a password. Only the Club, the loyalty account, needs a sign-in. The guest interface is complete in Czech, English, German, Russian and Ukrainian. Only the languages the restaurant has enabled are offered, the browser language is just a suggestion, and dish names appear in the languages the restaurant has translated them into. When the guest switches language, they stay on the same screen and the table context isn't lost.
The waiter call item appears only when the waiter call is available for that table. What a guest sees therefore depends on which modules and request types the restaurant has switched on.
The menu works for anyone who scans the code
The menu needs nothing: no account and no table context. Categories follow the order of the restaurant's menu. Search covers names, descriptions, labels and allergen codes, and the ‘for me’ filter („Pro mě“) narrows the choice by dietary preferences and the allergens the guest wants to avoid. It hides a dish only when the restaurant explicitly lists that allergen for it; nothing is guessed. In the dish detail, allergens are listed by name in the guest's language, always with a note that guests with a serious allergy should check with staff.
The rule for rollout is simple: the filter is only as good as the data. If an allergen is missing from a dish, the filter won't exclude it. For dietary information such as vegetarian, check during set-up where it comes from; according to the product documentation, guests currently see it only for labels imported from the POS. According to the same documentation, the allergen filter works. Designing a menu that is easy to browse on a phone is a topic of its own.
The waiter call has to know the table
The code on the table doesn't carry a table number but a table key. From it the server identifies the table, the venue and the restaurant, and for every request it checks that the table is active and the restaurant's website is published. The guest fills in nothing and staff know where to go. An invalid or old link doesn't block the menu; it just doesn't offer the waiter call.
In the sheet asking how the restaurant can help („Jak vám můžeme pomoci?“), the guest chooses from the types the restaurant has enabled: call staff, bring the bill, I need help, clear the table. A type the restaurant switches off isn't shown to guests and the server rejects it. With the bill, the guest can choose card or cash, but that is only a note for staff: Premium QR doesn't pay the bill, it asks for it.
A table only ever has one active request; when a second phone at the same table is used, it takes over the existing request instead of creating another. Requests arrive in real time in the app on the staff tablet, which sorts them into need attention, waiting and in progress („Vyžadují pozornost“, „Čekají“, „Řeší se“), each with the oldest first, showing the table, the type of request and the waiting time. One tap on the card closes the request, and the guest's phone shows that everything is done. The guest can cancel only a request nobody has handled yet. The full journey from code to tablet deserves an article of its own.
Reviews: feedback for the restaurant first
On the reviews screen, the guest sees the average rating and the number of ratings from published reviews, and only published reviews. Using the write-a-review button („Napsat recenzi“), they give one to five stars, an optional comment and, optionally, a name and e-mail address. A submitted review is never published automatically: it goes to ReviewHub and the restaurant decides whether to publish it on its website. Only then does it count towards the summary other guests see.
For low ratings, the restaurant can switch on a rule that opens a guest case from any rating at or below a chosen threshold. It is off by default and the default threshold is two stars. When a case is opened, Premium QR offers the guest the option to ask to be contacted: they fill in a name, an e-mail address or a phone number and explicitly confirm it. The request is stored with the case; it creates no CRM profile and no marketing consent.
First-party feedback and a public Google review are two different things, and both have their place. If you invite guests to leave a public review as well, invite everyone in the same way, regardless of how they rated you at the table. Google's contribution policy for Maps explicitly prohibits selectively soliciting positive reviews and discouraging negative ones. Never ask only happy guests for a public review.
The loyalty account: the only place with a sign-in
The Club item opens the guest's loyalty account. The sign-in comes only when the guest actually opens the Club, through Google or a secure link sent by e-mail, without a password. The account shows the tier, the points balance and tiles for coupons, stamp cards, personal details, benefits and points history („Moje kupony“, „Razítkové kartičky“, „Moje údaje“, „Výhody“ and „Historie bodů“ in Czech). The Club is enabled per deployment and per restaurant website, so it isn't automatically part of every QR menu.
Coupons that support it are activated by the guest before paying with the use-when-paying button („Použít při placení“). Only one is active at a time, valid for two hours. The discount is applied when staff scan the loyalty card at the till, so it depends on the POS connection, which is handled during set-up.
The card in the Club shows a QR code with the card number, the balance, the tier and the programme, and the guest shows it to staff when paying. A Wallet card is only a carrier, not another reward. The Google Wallet and Apple Wallet buttons appear according to the restaurant's Wallet settings; Apple Wallet, however, is still awaiting verification on a physical iPhone. A dynamic card QR code that refreshes continuously is a pilot feature and off by default. Points added at the till appear in an open card without reloading only with a deployed real-time connection. How a digital programme differs from paper stamp cards is covered in our comparison of digital loyalty programmes and paper loyalty cards.
Four actions compared
What each action behind one code needs
| Action | What the guest needs | Who responds in the restaurant | What to think about at rollout |
|---|---|---|---|
| Menu | Just the phone camera | Nobody; guests read on their own | Complete allergens, translations, publishing changes |
| Waiter call | A valid code for a specific table | Staff on the tablet | Enabled request types, one active request per table |
| Reviews | Nothing; name and e-mail are optional | A manager in ReviewHub | Who reads and publishes reviews and follows up after low ratings |
| Club | Sign-in through Google or an e-mail link | Staff at the till | POS connection, Wallet settings, coupon rules |
The table shows why one code doesn't mean one responsible person. The menu depends on data, the waiter call on the shift, reviews on a manager and the Club on the till. When one link in the chain is missing, guests experience it as an app that doesn't work, not as one team's mistake.
Illustrative example: Saturday lunch
Rollout step by step
- Each physical table has one key; you can print the same code in several places on the same table.
- If a code starts circulating outside the restaurant, the change-key function („Změnit klíč“) invalidates all old printouts and you put out new ones.
- Enable only the request types the team really handles. If you always bring the bill yourselves, leave just the waiter call.
- Agree that a request card on the tablet is closed only once it's handled, because one tap closes the request.
- Check that the waiter call is part of the venue's plan; without it the server rejects requests.
- Decide who reads feedback every day, who decides on publishing and who contacts a guest who asked to be contacted.
- For the Club, check the POS connection and Wallet settings, and explain to staff when to scan the card.
- Test in every enabled language, with an old printout of a code and with a low rating.
Frequently asked questions
No. Premium QR doesn't take orders or payments. Bring the bill is a request to staff, and choosing card or cash is just information for the server.
Only if they want to use the Club. The menu, waiter call, reviews and gallery work without an account; sign-in through Google or an e-mail link is offered only when the guest opens the Club.
No. Each action relies on its own module and settings. You can start with the menu and the waiter call and add the Club or the low-rating rule later. The waiter call and the Club appear to guests only when they are available for the restaurant and the table.
Key takeaways
One code on the table, with four separate processes and different owners behind it.
The menu needs nothing; the waiter call needs a valid key for a specific table.
A review goes to the restaurant first; publishing it is a separate decision.
Invite all guests to leave a public Google review in the same way.
Only the loyalty account requires a sign-in, and only when the guest opens the Club.
Premium QR doesn't take orders or payments; it only asks for the bill.
Conclusion
One code on the table is simpler for guests and clearer for the restaurant, but only when four well-configured processes with clear owners stand behind it. Start with menu data and table codes, then add the actions your team can handle every day. If you want to continue with the most operational of them, the next step is the QR waiter call.